

Easy DIY Project Using IOD Transfers: Perfect for Beginners
It’s a very expensive piece of wall art, right?
Nope - not even close! It’s a simple, oh-so-easy craft project with hardly any supplies. Really!
Ok here’s the whole story. I like to cut up my Iron Orchid Designs Decor Transfers into pieces. That way, I can mix and match to my heart's content as I’m creating. In fact - it’s almost like painting a picture, but so much easier.
I put together a simple project combining my IOD Transfer scraps to create a gorgeous little piece of wall art (and a bonus project, too.)
No time to read right now? Pin this post for later.
Follow along with the video tutorial below, or scroll on down to the step-by-step instructions. And - bonus! - there are two projects in the tutorial, so make sure to keep watching to the end (min 10:07) for another super easy craft project idea.
HERE’S EVERYTHING YOU’LL NEED TO MAKE THESE PROJECTS USING IOD TRANSFER PIECES
🌸 Cut up pieces of any IOD Transfer
🌸 IOD Japonica Transfer (this is what I used)
🌸 Floating Frame
🌸. Card stock (a sheet larger than the Floating Frame)
🌸 Good pair of scissors
🌸 Bonus Project: any hard sided handbag
Guess what - that’s all I used in this project. If you’re new to IOD Transfers, you should know I can usually get FOUR projects from one transfer. (Unless I’m applying the transfer to a large piece of furniture.) One transfer set can generate a lot of individual pieces.
STEP-BY-STEP INSTRUCTIONS FOR THIS DIY WALL ART USING THE JAPONICA TRANSFER.
STEP 1: TAKE FLOATING FRAME APART
It’s easy to dismantle a floating frame - just remove the clips from all sides. Place the glass, and the frame backing in a separate location to keep them safe. You won’t need them again until the end of this project.
STEP 2: PREP THE CARD STOCK
I use the paper that comes inside the frame as a template to get the perfect size from the card stock. Just lay it on the large sheet of card stock to cut it out. If you’re making multiple pieces of wall art, cut out all the card stock you’ll need for each one in this step. (Min 1:06)
STEP 3: DESIGN LAYOUT
Here’s where you let your creativity out to play. Don’t doubt yourself. Grab the transfer pieces you’ve chosen, or use the exact pieces I used from the IOD Japonica Transfer. It's the makers' choice!
As you’re designing the layout, think about the rule of thirds for compositions. (1:28) Imagine your card stock in thirds and balance the layout using this visual guide. It’s also important to consider the scale of each piece so they balance out the overall design.
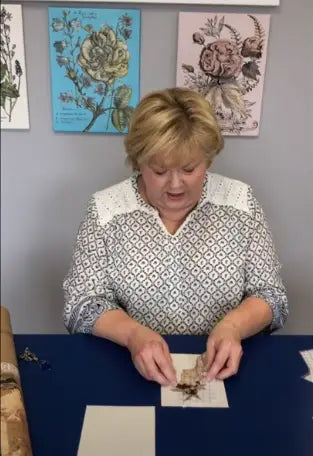
STEP 4: RUB-ON TRANSFER PIECES
The IOD Decor Transfers come with a small plastic applicator you’ll use to rub them onto the project surface. Simply take the white backing paper off the transfer sheet and place it in the spot you’ve chosen on the project surface.
Take the applicator stick and begin to firmly rub the top sheet so that the transfer, underneath, adheres to the project surface. (2:29) Pull up an edge of the plastic sheet to see if there are pieces of the transfer that need more rubbing.
Once all the transfer is on the project surface, use the plastic backing sheet to burnish it into place. Simply turn the backing sheet over and rub it across the entire surface of the transfer. (2:54) My card stock had a texture similar to canvas, and the burnishing gave the transfer that same gorgeous texture.
STEP 5: LAYER TRANSFER PIECES
Continue by repeating the actions in Step 4, as you add more transfer pieces to create your composition. You really can’t go wrong with this step, and depending on what transfer scraps you’re using - follow the rule of thirds. (3:18)
When you’re cutting a transfer apart, take your time and make sure you cut where a design naturally terminates. I got a little carried away when I cut a piece of the Japonica transfer and left a stem that I should have included in my scrap. (5:49)
Hint: leaving the white backing on the transfer when you’re cutting will prevent your scissors from sticking to the transfer backing. (6:29)
I place some of my transfer pieces moving off the edge of the project surface. Another pro-tip is to use the white backing paper that came with the transfer to keep the edge of a piece you place off an edge from sticking to your work surface. (7:43)
STEP 6: PUT THE FRAME TOGETHER
Once you’re satisfied with the design and composition of your project - and you don’t want to add any further transfer pieces - it’s time to assemble the frame. Take the glass, frame backing, and clips you dismantled in step one and reassemble them with the art piece in the frame. (9:03)
And that’s all there is to it! You can, however, use some IOD Stamps on your piece to create a multi-media effect. And you can also continue to add pieces of transfer to the outside of the frame, on the glass. This will give your wall art a layered look.
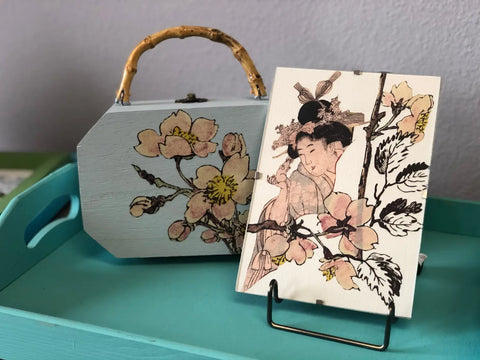
STEP 7: BONUS PROJECT
Just for fun, and because I still had more beautiful scraps of the Japonica Transfer, I made a hard-sided purse decorated with the rub-on transfer. (10:07)
All the same steps are required as in the wall art: rubbing on the transfer and burnishing the pieces with the backing sheet. I covered both sides of the purse with a variety of transfer pieces - and I think it turned out fabulously!
This is a great project that is simple enough to be adapted for a fun kids’ art project. I want to see what you create - so please send me pictures.